Rostering people
There are various options for adding or rostering people to events, all of which are easy steps to follow. The first two ways are by opening the actual event details, which can be done searching for the event in the search bar. To add or remove people click the ‘Update roster’ link in the ‘People’ section of the event details page.
Another way to assign people to an event is by going to the ‘Events’ link on the left hand of your screen, then selecting ‘All Events’. To add or update people rostered click on the icon, next to the particular event, that resembles a group of people. This link will present you with two lists at the top of the page, the list on the left hand side contains all groups the event is shared with, including the group that manages the event. Selecting one of the groups in this list will display all the members of this group in the list on the right hand side. This list then allows you to add people to the event. To add people to your event, either select a member and click ‘Add to event’ or double click on a person’s name. You can add multiple people to an event by holding down the ‘Shift’ key to select members consecutively or the ‘Ctrl’ key and selecting people’s names, then click ‘Add to event’.
Using this section you can add people to the roster. Find them by group by selecting their group name in the left hand box and then their name in the right hand box (you can quickly scroll to their name by starting to type it) then either double click the name or select their name and click 'Add person'.
You can also find people by clicking search and typing their name then clicking their name. This will add them to the roster.
Do this for the entire event roster, assign roles, such as team leader etc and change the “Rostered Times” of people who have informed us that they cannot partake in the entire shift. The next step is to similarly assign resources via the Resources tab and the same process.
Once everyone and everything has been added, click 'Save & close'. Anyone you have added to the event will be automatically notified, letting them know they've been added to the roster. Likewise, and changes to the roster or deletions will be sent to the people who are affected. Those who are rostered will also be reminded closer to the event that they're on the roster, along with further details about the event, when and where it is, etc.
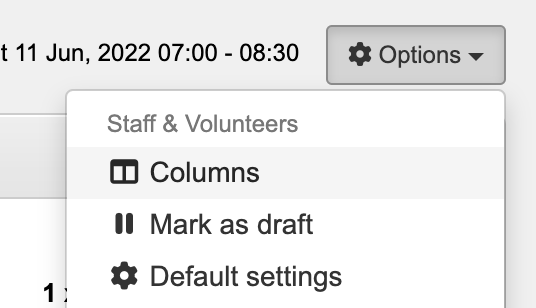
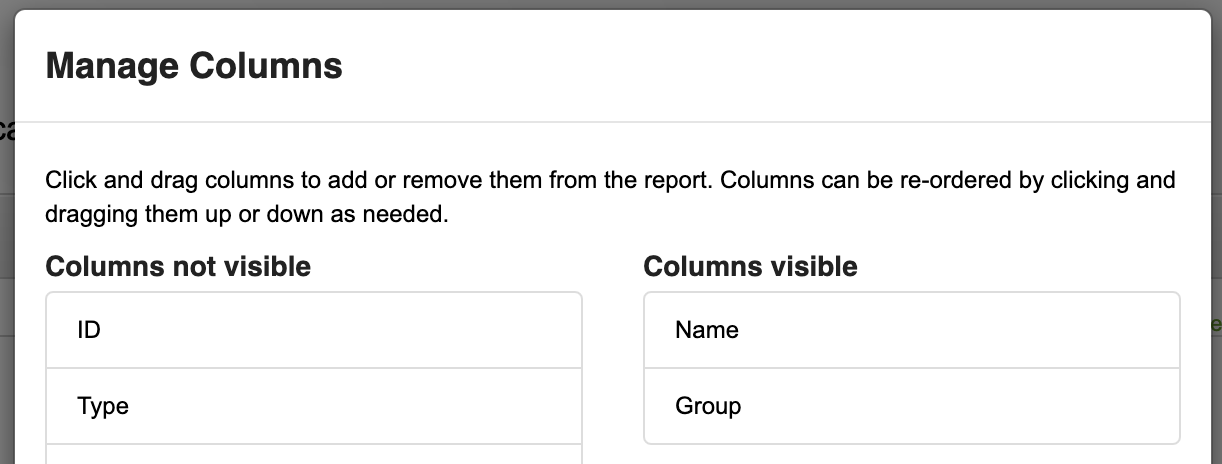
Additional information can be added to the rostering screen if needed by clicking 'Columns' in the 'Other options' menu at the top-right of the allocate-people page;
From there, add & order the columns as required, in the same way you can manage-columns shown in the reports;
The additional columns will then appear as they've been requested (to the left of the 'Rostered Times' column);
The above diagram shows the process of assigning someone to an event.
The above diagram shows the process of updating existing rosters for an event. This might be changes in times, the status, position or other information related to someone at a particular event.


