Xero
- Victor Macko
The Xero integration with VTEvents supports the following;
Invoicing;
- Export customer & client contact details (automatically when invoicing)
- Invoicing events
Payroll;
- Export employee details (automatically when processing pay-run)
- Payroll, as
- Timesheets
- Payslips, including;
Getting Started
To connect to your Xero Organisation, follow the following steps;
- First goto the 'Settings' page, and within the 'Accounts' tab
- Select 'Xero' as either your invoicing accounting package, and/or your payroll accounting package, depending on what you would like to use it for.
- Click 'Save changes', then;
- Click 'Connect to Xero' to connect VTEvents with your Xero organisation.
This may require you to sign into your Xero account. Xero will then ask you which organisation you would like to use with VTEvents. - Select the appropriate organisation, and follow the prompts.
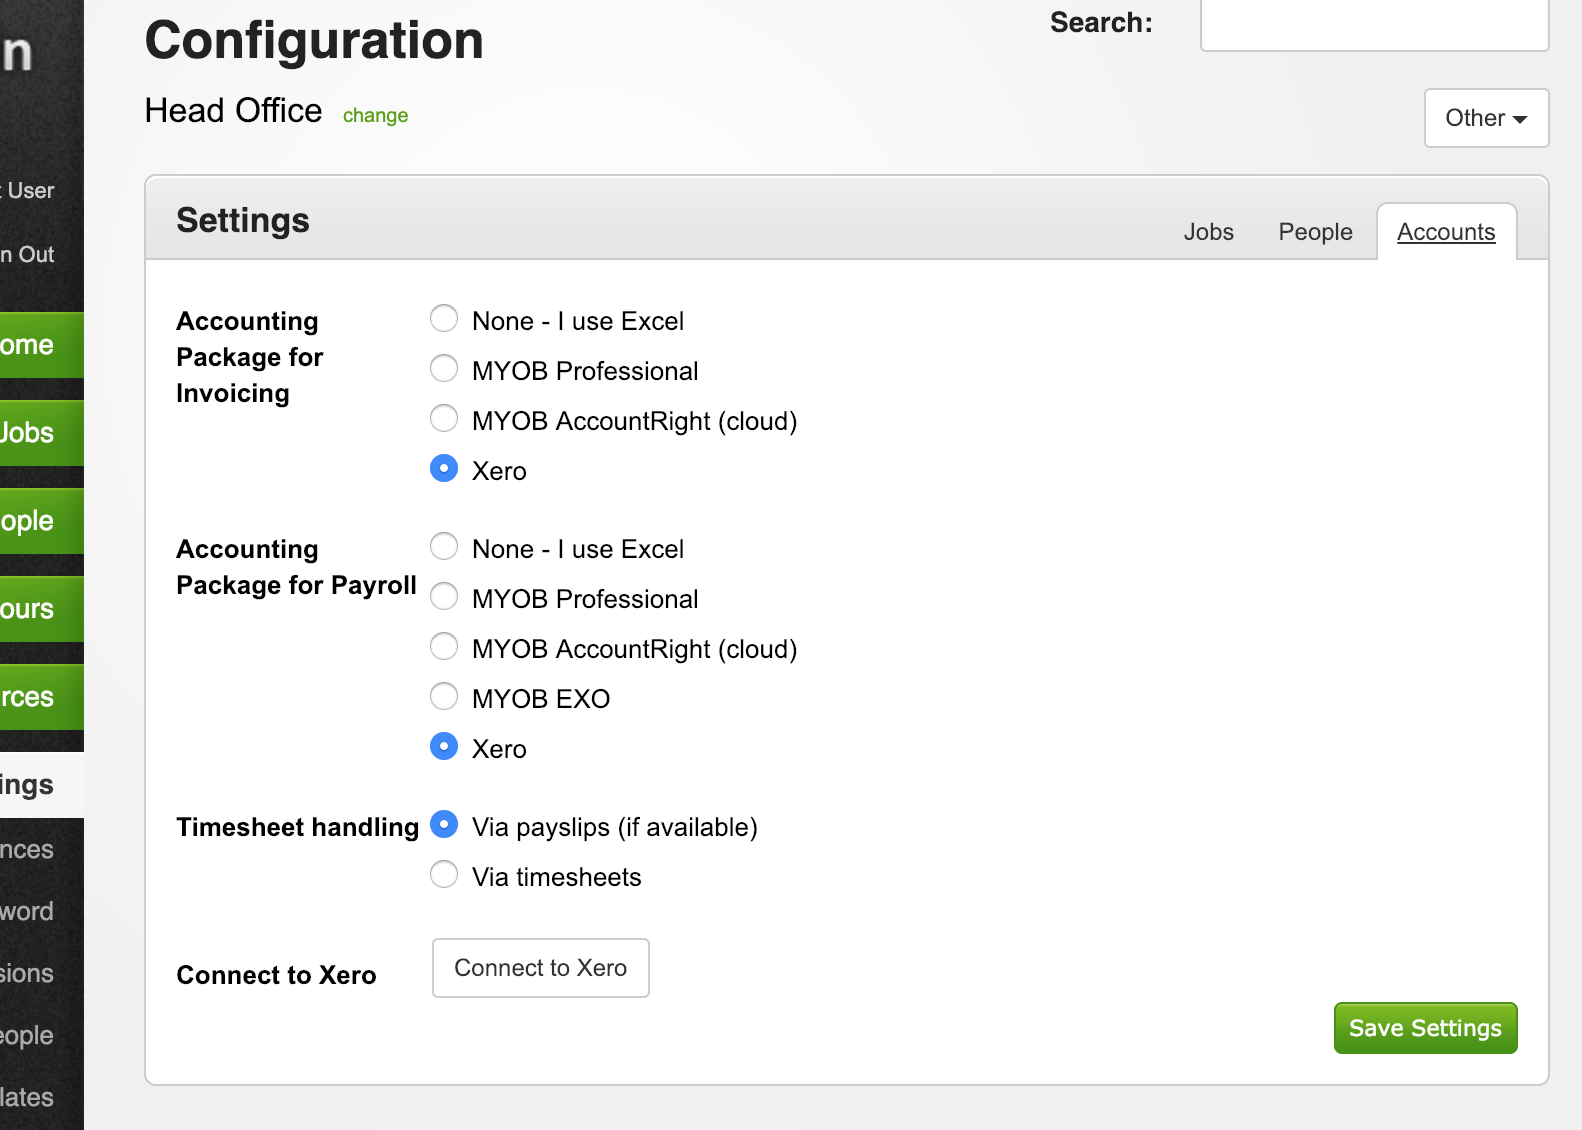
Click 'Save Settings' to save your changes.
Once done, we'll have access to view your organisation's information (eg. retrieve employee information when submitting timesheets), as well as adding and updating any existing information (eg. adding to your customer list to raise invoices against, and adding new contact details for the events you schedule).
Invoicing
When integrated with Xero, invoices raised will be sent to Xero and appear either as 'Draft', or 'Awaiting Approval', depending on your invoice settings within VTEvents.
To setup invoicing, ensure 'Xero' is selected as your 'Accounting Package for Invoicing', and click 'Connect to Xero' if you haven't already done-so.
Payroll
To use Xero for your payroll, first select 'Xero' as your 'Accounting Package for Payroll', and click 'Connect to Xero' if you haven't already done-so.
If you're using Xero for your payroll with VTEvents, you'll need to make sure the pay-rates are setup (we'll retrieve your pay-items from Xero and need to confirm everything matches up). The default payroll calendar and other settings are also set within the 'Pay rates' area at the same time.
If you have allowances, they'll also need to be reviewed and saved, to ensure the allowances setup are sent with the correct corresponding allowance pay-items set when they appear in the pay-slip in Xero.
New Employees
The following fields are required when employee information is being sent to Xero, and must be entered in VTEvents when processing payroll;
- "Joined Date" is used as the "Employee Start Date" in Xero
- Residential address (including state & postcode)
- Date of birth
Within the 'Configuration' area (in 'Pay Rates'), an 'Hourly Rate Code' and 'Tracking Category' should also be selected, as this is used as the defaults set for new employees being sent to Xero.
Secondary information required within Xero
Note: After new employees are entered in Xero, the following lines will need to be added to the "Pay Templates" area within Xero, as this is required to have new pay-runs & pay-slips entered;
- Superannuation Guarantee Contribution
Payroll is available in two formats;
- Pay-runs (as hours worked)
- Timesheets
Timesheets
This option will tally together hours worked for each pay-rate, and send these to Xero within the 'Timesheets' area.
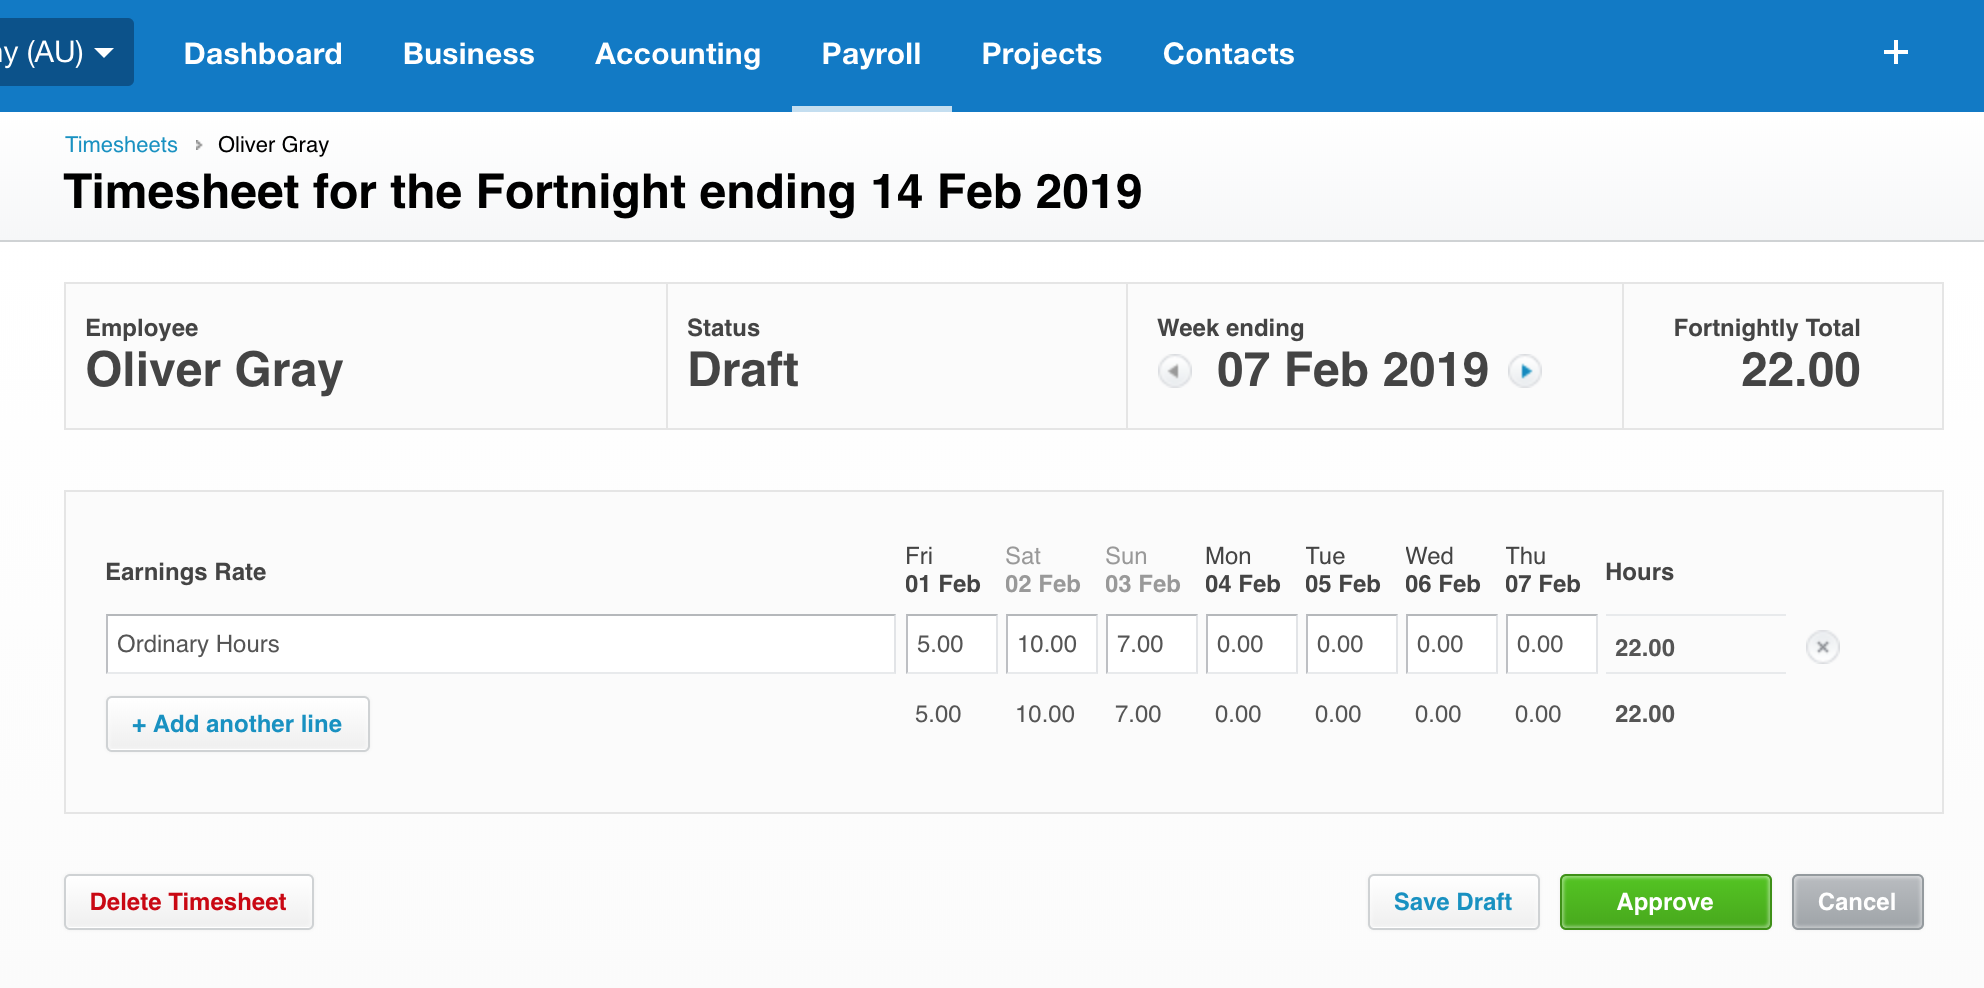
Approving this timesheet will then create a payslip based on the persons payslip template, with the hours which had been included in the timesheet.
 '
'
Note: Allowances and expenses are sent through to the payslip directly, however are removed within Xero when the timesheet above is approved.
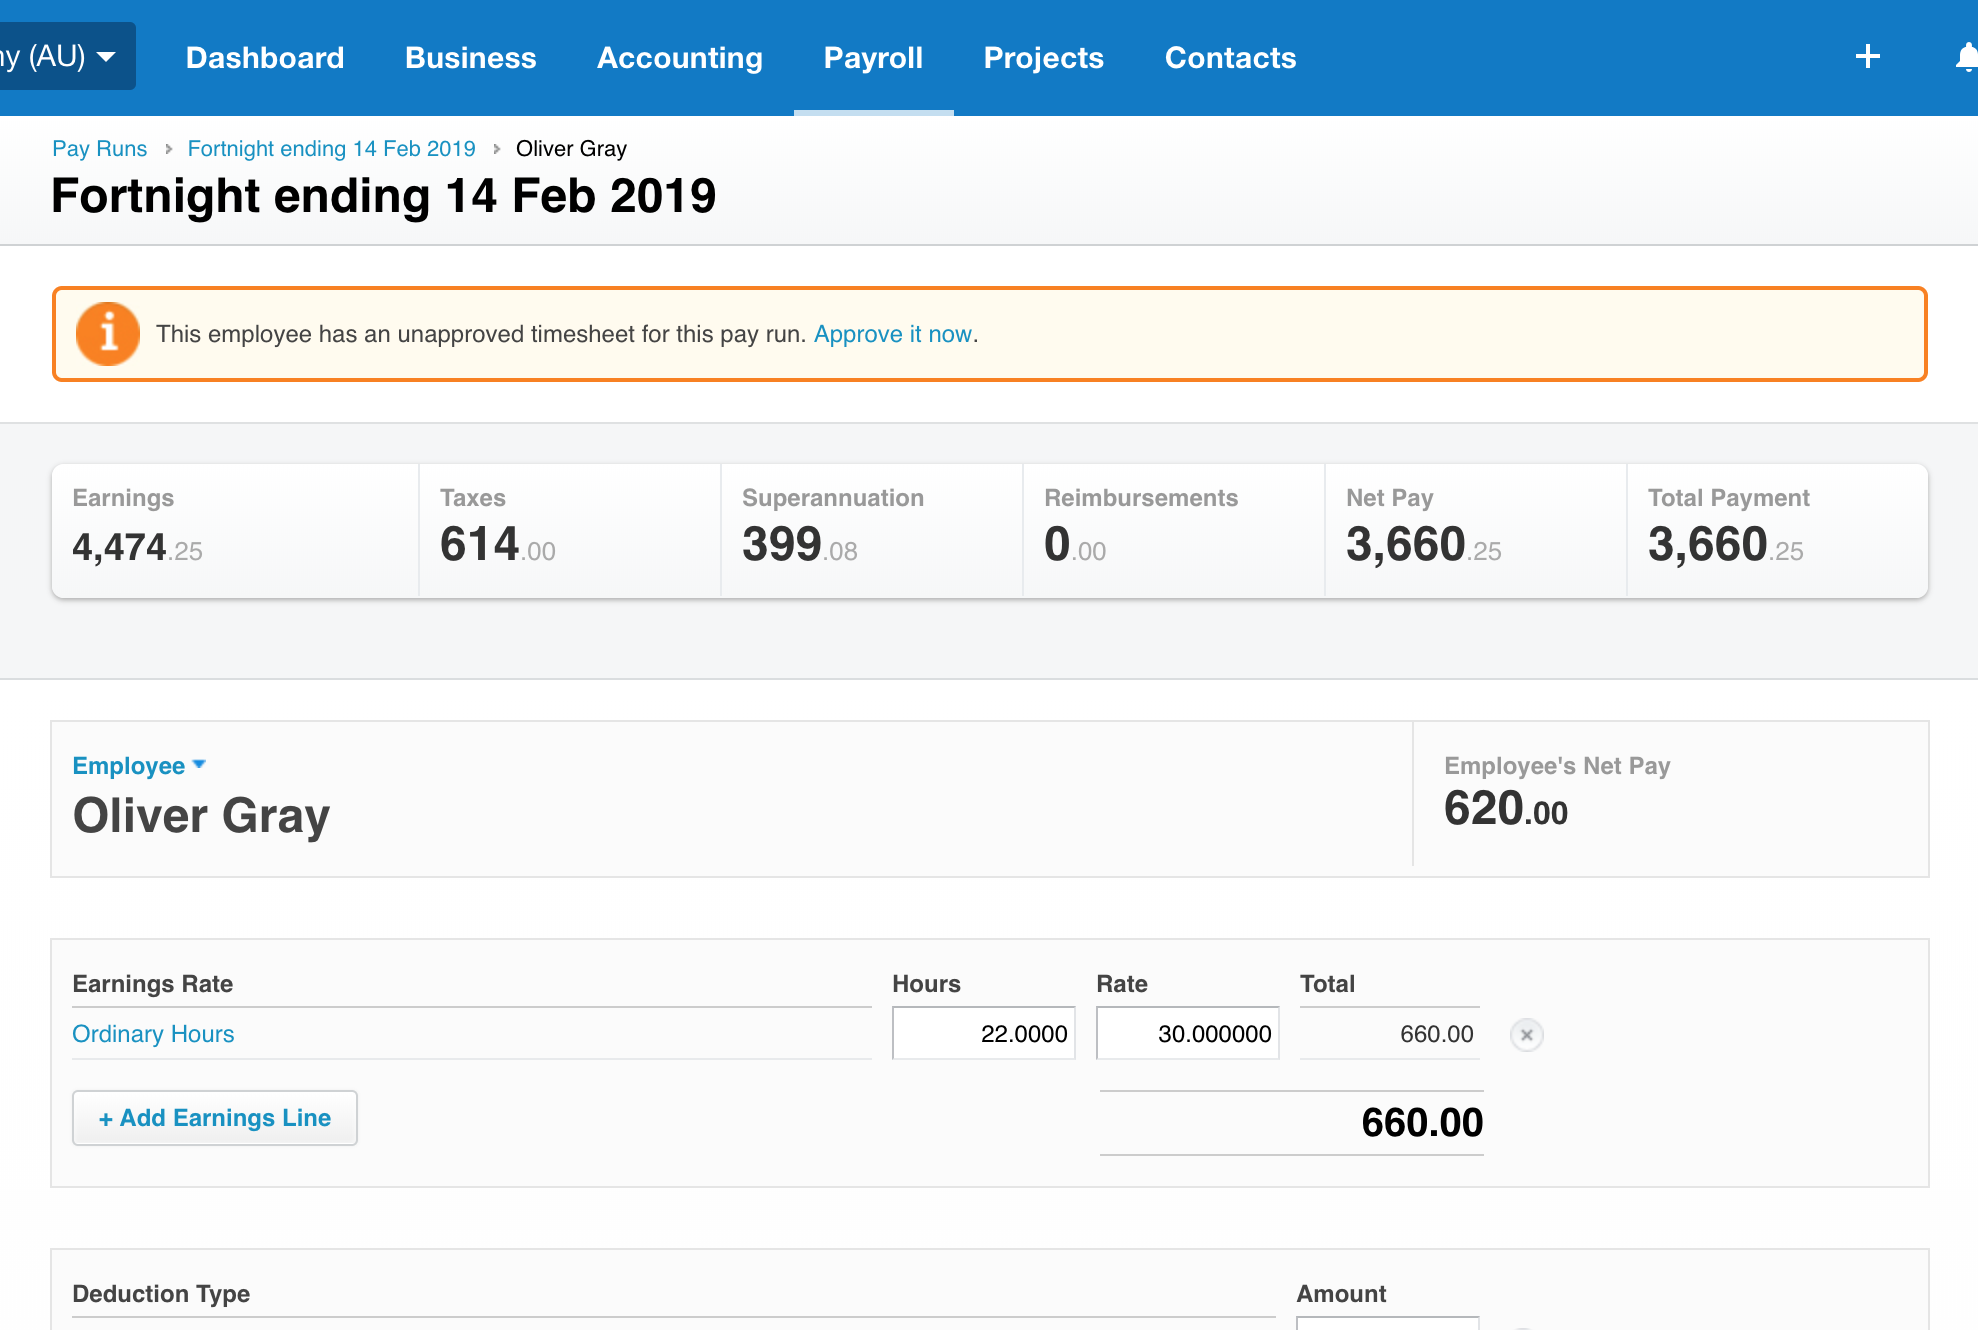
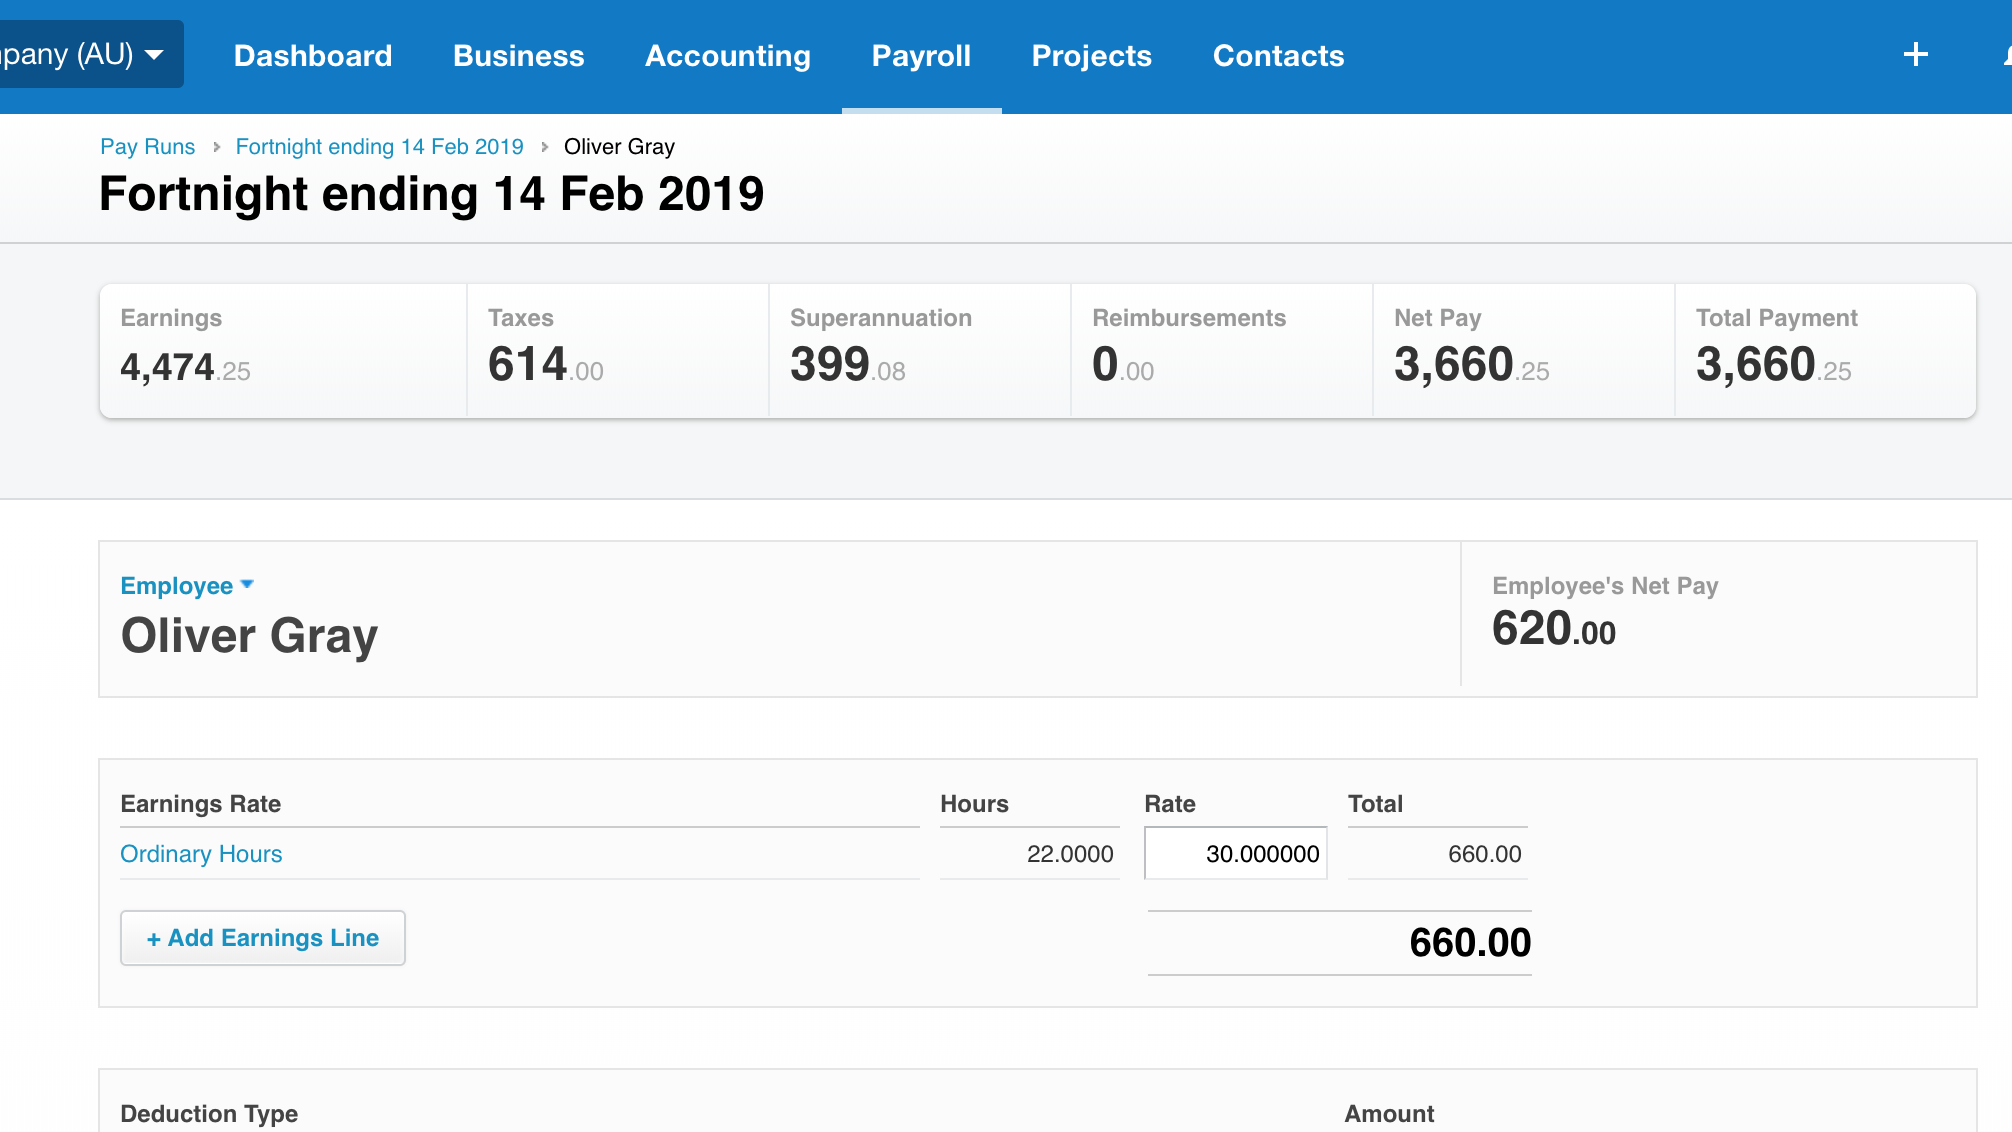
Payslips
Alternatively, the 'Timesheets' step can be skipped if you decide to have hours worked sent directly to the person payslip from VTEvents.
This option does also include allowances, expenses and so-forth which might also be included from VTEvents.
In this instance, the payslip would look similar to the one below, with a total of hours worked for the period, for each different rate worked.